
RPM Book
|
The Jefferson Nickel RPM Book |
|||
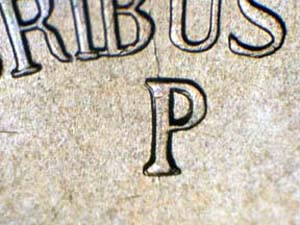
| 1942-P RPM-020 | ||||
|
|
|
|
|
|
|
|
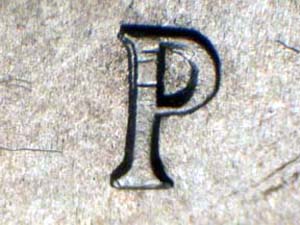
Reported by: James Wiles Comments: P/P West. |
|||||||||||||||||||||
| Stage B Photos | ||||||||||||||||||||||
 |
 |
 |
||||||||||||||||||||
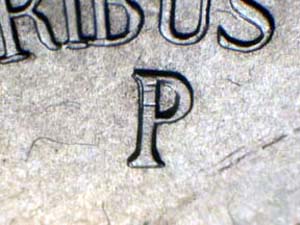
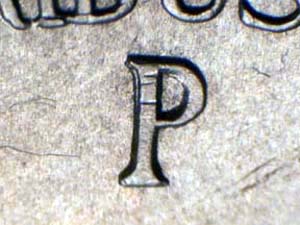
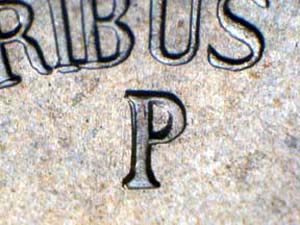
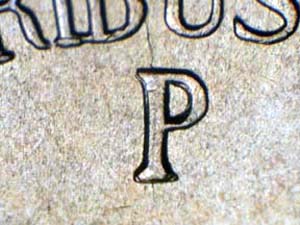
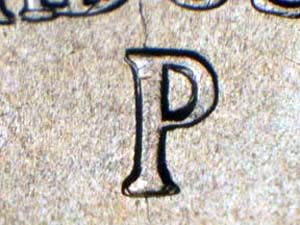
| Wide View of Mintmark | Close-up of Mintmark | Magnified RPM | ||||||||||||||||||||
 |
 |
|||||||||||||||||||||
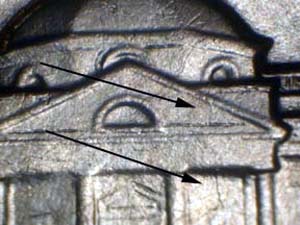
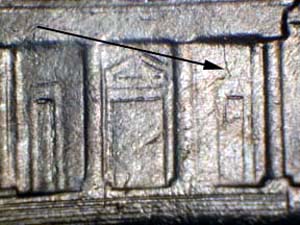
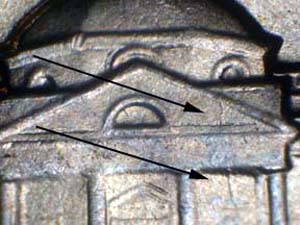
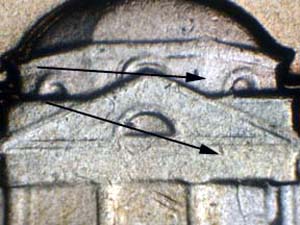
| Die Crack from Right Dome | Die Crack between Pillars # 3 and 4 | |||||||||||||||||||||
| Stage C Photos | ||||||||||||||||||||||
 |
 |
 |
||||||||||||||||||||
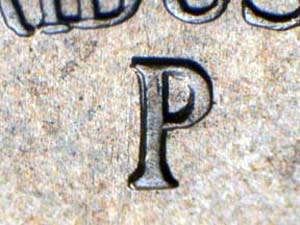
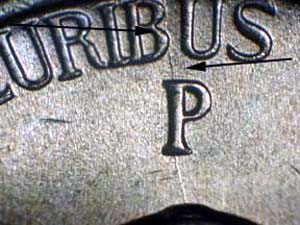
| Wide View of Mintmark | Close-up of Mintmark | Magnified RPM | ||||||||||||||||||||
 |
 |
 |
||||||||||||||||||||
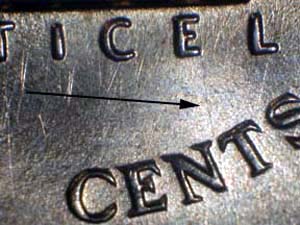
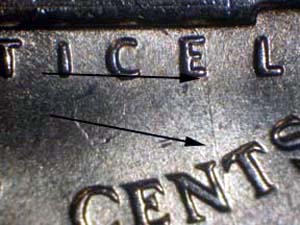
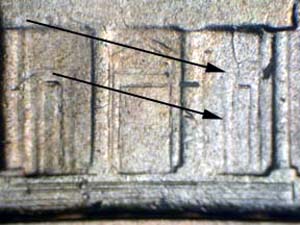
| Die Crack from Right Dome | Die Crack through E of MONTICELLO | Die Crack between Pillars # 3 and 4 | ||||||||||||||||||||
| Stage D Photos | ||||||||||||||||||||||
 |
 |
 |
||||||||||||||||||||
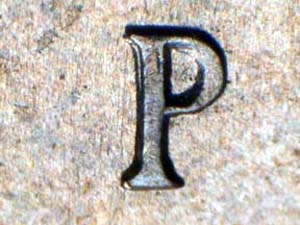
| Wide View of Mintmark | Close-up of Mintmark | Magnified RPM | ||||||||||||||||||||
 |
 |
 |
||||||||||||||||||||
| Die Crack from Rim to Dome | Die Crack through E of MONTICELLO | Die Crack from Right Dome | ||||||||||||||||||||
 |
 |
|||||||||||||||||||||
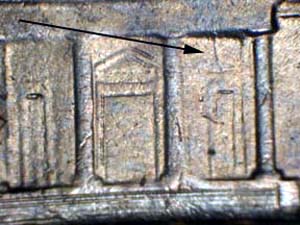
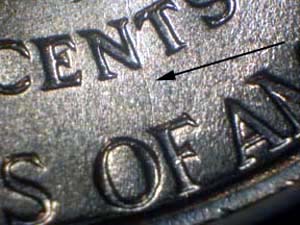
| Die Crack through N of CENTS | Die Crack between Pillars # 3 and 4 | |||||||||||||||||||||
| Die Stage and Markers Chart | ||||||||||||||||||||||
|
||||||||||||||||||||||
| Top of Page |
||||||||||||||||||||||
| | Home | RPM Listings | OMM Listings | About the Author | | ||||||||||||||||||||||
|
Copyright James Wiles, 2020 |
||||||||||||||||||||||